Call Us Now: (502) 631-9731

A + Appliance Repair

How to fix my dryer?

A+ Appliance Repair Services

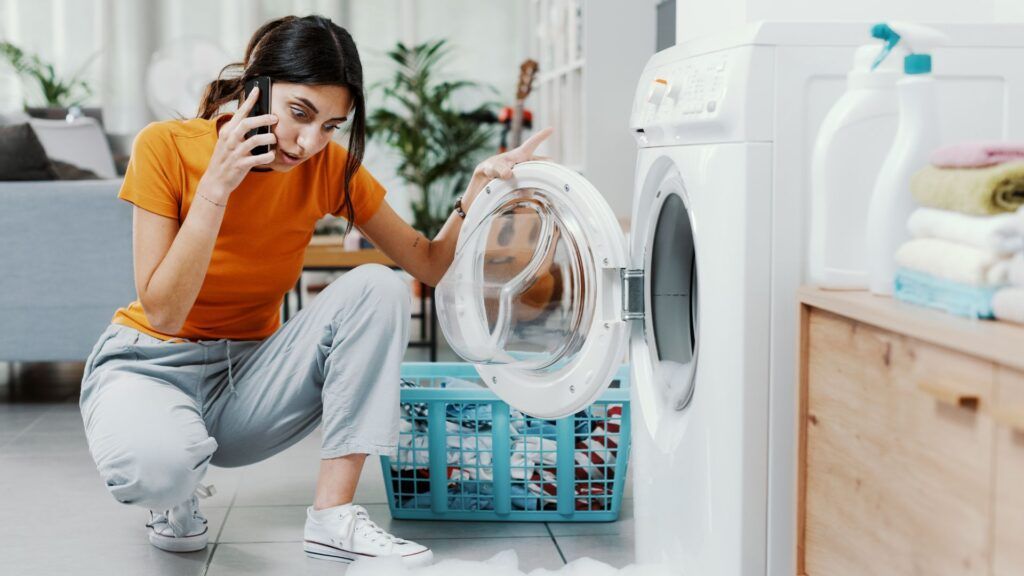
There’s nothing worse than finally getting around to wash that mountain of dirty clothes in your closet only to realize your dryer has some fault. In most cases, we all check that the dryer is properly plugged into the electrical outlet or check the central home electrical box to see if a fuse has blown or a circuit breaker has tripped. But sometimes the problem is beyond these issues, and we need to look for an "appliance repair near me."


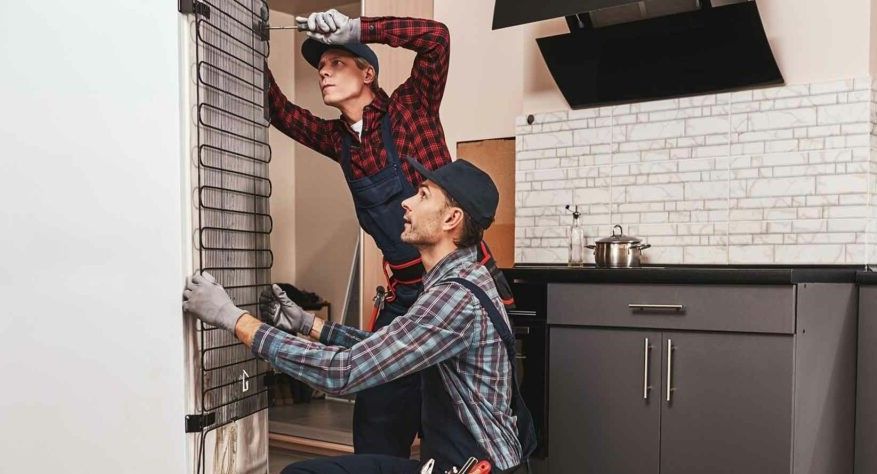
So whether you're a DIY enthusiast or seeking insights before calling in the professionals, in this blog we'll discuss some causes of dryer malfunctioning and ways to fix them no matter what brand it is. This will save you time and money and help you get back to your routine as soon as possible.

1. How to fix my dryer if it is not starting?

This problem can occur for several reasons. It’s possible that the door latch is broken, or something is preventing the door from closing. It could also be that the start switch is malfunctioning. Door switches wear out from normal use, but repeatedly slamming the door can speed up their demise.

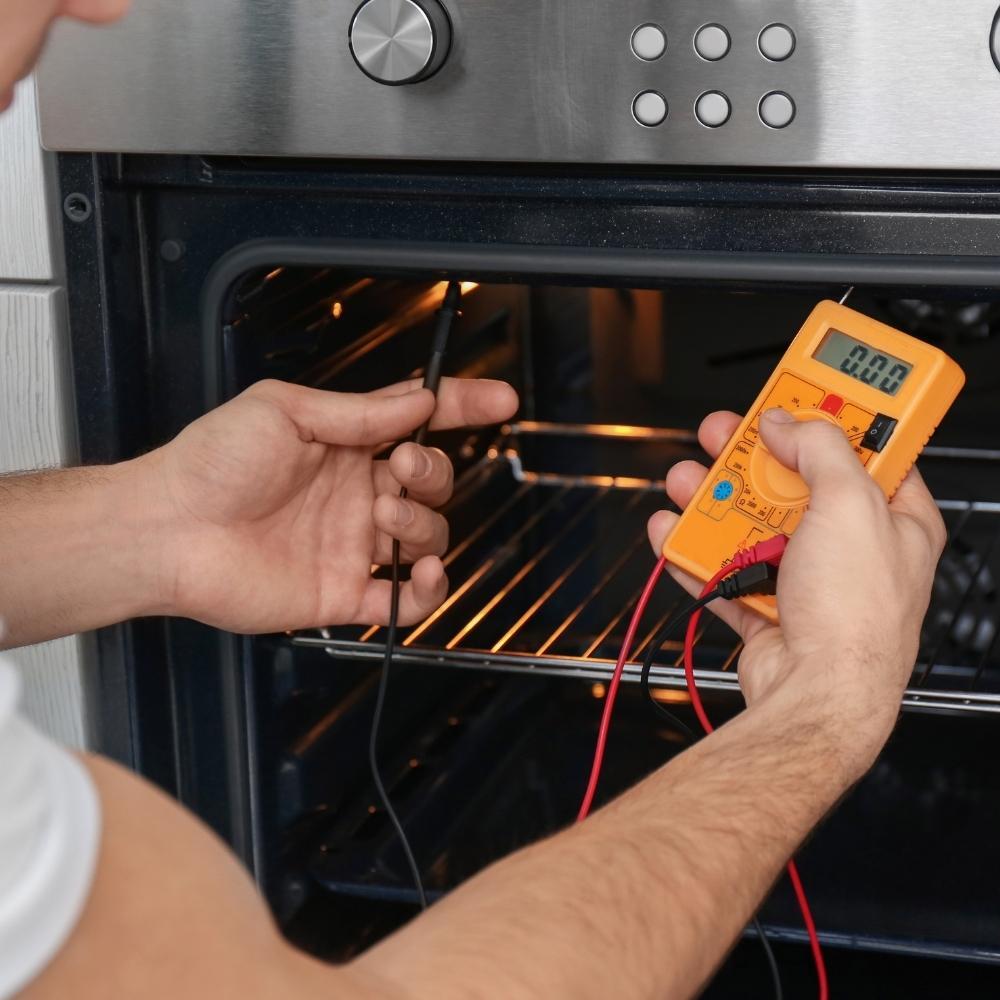
Start by checking the plunger located on the door for dryer troubleshooting. If it’s missing or bent, replace it. If the plunger checks out, the next step of dryer troubleshooting is to remove the top cabinet panel to gain access to the door switch. Test the switch for continuity. If not, then replace it. Sometimes they can also just get coated with lint. Use a cotton swab and a bit of rubbing alcohol to clean the contact areas.

If the switch is good, test the thermal fuse mounted on the blower. If you have had a power outage or surge in your home, it is possible that the thermal fuse in the dryer control panel is damaged. This is to prevent the dryer from catching fire, which is obviously a very good thing! The fuse is inexpensive and easy to replace. For those who have a gas dryer with a lint filter in the door, access the thermal fuse by opening the bottom panel. If the filter slides into the top of the machine, remove the entire front panel. On an electric dryer, remove the rear service panel.

2. How to fix my dryer that won't spin/rotate?

This can occur if the belt that connects to the motor and causes the drum to rotate is broken, the motor itself is defective, or if the thermal fuse has blown out.

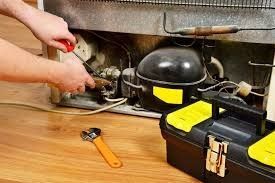
Usually, the belt is broken. To replace the belt, remove the front cabinet panel and lift the entire drum out of the cabinet. Then, vacuum it to suck out all the lint. Then spin the tensioner roller by hand to see if it runs smoothly and examine it for cracks. Replace the tensioner if it fails either test.

Reinstall the drum and wrap the new belt around it (ribs facing the drum). Some tensioners are mounted behind the motor, so they’re difficult to see from the front access panel. You’ll have to do this by feeling. Reach your hands around the blower housing and lift the tensioner up while you route the belt around the motor pulley.

Although we have discussed the DIY method, as the system is complex, we recommend approaching a professional for appliance repair Louisville KY to inspect your dryer.

3. How to fix my dryer when it is making noises?

If your dryer is making clanging or knocking noises, start with the simplest fix. Stop the drying cycle and check inside. Are all buckles on clothes fastened? Are zippers zipped? Are there coins, cell phones, or keys taking a spin? Remove the offenders and the noise should stop.

If your dryer is still noisy or vibrates, it might be off-balance. You must take steps to level the dryer, or it will never be quiet, and further damage to the structure can occur.

If the dryer is making screeching or squealing noises, the problem is worn drum bearings or supports. Unless you are very handy with tools, this will require an expert appliance repair service near you because the entire unit must be disassembled.

4. How to fix my dryer if it is taking too long to to dry clothes?

If it takes forever for a load of clothes to dry and your clothes come out covered in lint, clean out that lint filter! If the lint filter is full, then air is not flowing freely and your machine is forced to work longer than necessary.

After you empty the filter, give it a good cleaning to get rid of any residue from dryer sheets. You should also use a bit of rubbing alcohol to clean the electronic moisture sensors (one or two little metal strips inside the dryer drum). You'll get your dryer working more efficiently and prevent a possible fire.

If your dryer seems to operate normally yet it’s taking more time than usual to dry a load of clothes, there could be other reasons like you have overloaded the dryer, your washing machine isn’t removing enough water during the spin cycle or the dryer vent or vent pipes could be clogged, preventing water vapor from evaporating properly. This could also be a fire hazard.

If the dryer drum seems too full, try dividing loads of wet laundry into smaller loads. Most manufacturers recommend loading your dryer 2/3 full or less but check your owner’s manual for details.

If you suspect your washing machine may not be removing enough water during the spin cycle, check the owner’s manual for tips on how to troubleshoot this issue.

Try checking the dryer vents and vent pipes to make sure they’re clear. If you spot a clog, remove it before continuing to use your dryer. Use a long-handled bristle brush to clean out the dryer vent. The vent should be as short as possible between the machine and the outside exhaust vent to prevent clogs. If the venting system is long and you can't reach the entire length with a brush, use a leaf blower to clean the system or hire a trained appliance repairer near you.

Also, if you have a smart dryer with an automatic sensor that detects when clothing is dry, the sensor could be defective. If you suspect that the timer or automatic sensor isn’t working properly, look for appliance repair near you to inspect your dryer.

5. How to fix my dryer if it doesn't stop?

Most dryers have an internal mechanism that prevents the drum from spinning when the door is open. If your dryer continues spinning even after you’ve opened the door, it’s possible that the door switch is blocked or broken, or the door sensor — if there is one — is malfunctioning.

Try replacing the door switch. If the dryer continues to operate call a professional appliance repair near you to inspect it.

6. How to fix my dryer if the door won't stay shut?

If your dryer door won’t stay closed, chances are the latch is either bent or missing, or the strike is worn. Replace the bent or broken latch by taking it out. Then install the new one, pushing in firmly until the locking tabs seat. Next, protect the door’s finish with tape and remove the old strike. Jam a small screwdriver into the strike and bend the metal locking tab inward. Pry upward with a second screwdriver to pop it out. Snap in the new strike and you’re back in the laundry business.

Fast & affordable appliance repair near you - A+ Appliance Repair


If you have tried all the troubleshooting steps and your dryer still has issues, it’s time to call an appliance repair expert near you. There could be other issues going on related to faulty electrical components or other complex parts of the dryer. Problems like these should be safely diagnosed and repaired by a trained professional.

A+ Appliance Repair has a team of qualified and courteous technicians you need to get your dryer spinning again. Our local teams offer up-front pricing, flexible scheduling, guaranteed quality parts, and quality work in Louisville and nearby areas. We offer 24/7 repair services —no matter the brand or where you bought them.


Call Us

TAGLINE

Testimonials

image

These folks are the best! My oven stopped heating, and I was worried about the cost. They were quick, explained everything, and even gave me some handy tips. Five stars for sure.

James Faber

Jan 12, 2024
image
image

Couldn’t be happier with the service. My dishwasher was leaking, and they fixed it up perfectly. The whole process was smooth, and the tech was really nice. Highly recommend them!!

Jane Wilson

June 30, 2024
image
image

Wow, these guys are amazing! My fridge broke down right before a big family dinner, and they saved the day. The tech was super friendly and fixed it in no time. Definitely my go-to for any appliance issues!

Jeremy Johnson

July 10, 2024
image
image

Had a great experience with this company. My washing machine was acting up, and they came out the same day I called. The technician knew exactly what to do and got it working again. Super happy with the service.

Michelle Brown

June 25, 2024
image
By Noah Adams March 25, 2025
From our fridge stops cooling to a dishwasher suddenly flooding in the kitchen, appliances can significantly affect our daily lives as we are greatly dependent on them. Sometimes, we try to repair appliances ourselves without the right skills and tools, which can lead to further damage, potentially turning a minor issue into a costly problem. Understanding the need of the hour, in this blog, we have listed some top factors that one should consider when looking for an expert appliance repair near you. Professionals not only have the technical expertise but also understand the workings of different appliance models and brands, allowing them to diagnose and fix issues more efficiently and accurately. Additionally, professional appliance repair services often come with warranties, giving you peace of mind that if anything goes wrong after the repair, the issue will be taken care of.
By Rob Steinborn August 9, 2024
Samsung Dryer Not Heating Up? Call the Experts at A+ Appliance Repair Services Don’t let a simple fix turn into a big problem. Get your dryer working again with a quick call to our professional technicians.
By Rob Steinborn July 31, 2024
Why GE Appliance Repairs and Service is the Best Choice with A+ Appliance Repair Services near Louisville, KY
The DIY Appliance Repair: When to Call a Professional vs. When to Fix It Yourself
By Rob Steinborn July 20, 2024
Picture this it’s Saturday morning, and you’ve just discovered your dishwasher isn’t draining. You’re tempted to grab a wrench and dive in, but should you? In this blog, we’ll help you determine which appliance issues you can handle on your own and which ones need the expertise of a professional, ensuring you save time, money, and avoid unnecessary stress.
Clean Your Whirlpool Refrigerator Coils Once a Year and Save Big on Energy Bills!
By Rob Steinborn June 30, 2024
Perform Maintenance on your Whirlpool Refrigerator by cleaning your condensers once a year!
Deep Freezer Maintenance
By Rob Steinborn January 12, 2024
The Ultimate Guide to Freezer Maintenance: Tips and Tricks for Longevity Understanding Your Freezer: A Quick Overview Your freezer is an indispensable appliance in your home, working tirelessly to keep your food fresh and safe. Understanding how it operates is the first step in ensuring its longevity. At its core, a freezer maintains low temperatures by efficiently removing heat from the interior. Regular Maintenance: The Key to Freezer Longevity To keep your freezer running efficiently, regular maintenance is crucial. This includes routine cleaning of the interior and exterior, checking and replacing door seals if necessary, and ensuring the unit is level. Defrosting your freezer periodically is also essential to prevent ice buildup. Common Freezer Problems and DIY Repair Tips Even with regular maintenance, freezers can encounter problems. Common issues include over-freezing, strange noises, and failure to maintain the correct temperature. Many of these can be addressed with simple DIY solutions, such as checking the thermostat settings, cleaning the condenser coils, and ensuring the freezer is not overloaded. When to Call a Professional Repairman Some freezer problems are more complex and require the expertise of a professional freezer repairman , such as A+ Appliance Repair. If your freezer stops working entirely, makes loud or unusual noises, or shows signs of a coolant leak, it's time to call in an expert. A skilled technician can diagnose and repair the issue, ensuring your freezer's longevity and efficiency. In this guide, we've explored essential freezer maintenance tips and DIY repair solutions to keep your appliance in top condition. Regular care and knowing when to seek professional help are key to ensuring your freezer remains a reliable and efficient part of your household.
By Rob Steinborn October 3, 2023
Troubleshooting The Most Common Refrigerator Problems
Top Loader vs Front Loading Washing Machines in Louisville KY
By Rob Steinborn August 30, 2023
Top Loader vs. Front Loader Washing Machines: A Maintenance Comparison When it comes to choosing a washing machine for your home, you're faced with the age-old dilemma: top loader or front loader? Both types of washing machines have their own advantages and disadvantages, but one aspect that often gets overlooked is maintenance. In this article, we'll delve into the world of washing machine maintenance to determine whether top loader washing machines are better than side loader washing machines from a maintenance perspective. Understanding the Basics Before we jump into the maintenance comparison, let's briefly explain the differences between top loader and front loader washing machines. **Top Loader Washing Machines:** - These machines have a vertical drum, and you load your laundry from the top. - They are generally more affordable upfront. - Top loaders tend to have shorter wash cycles. **Front Loader Washing Machines:** - These machines have a horizontal drum, and you load your laundry from the front. - They are known for their efficiency in terms of water and energy usage. - Front loaders typically have longer wash cycles but are gentler on clothes. Maintenance Considerations Now, let's explore the maintenance aspects of both types of washing machines: 1. Mold and Mildew: - **Front Loaders:** Front loaders are more prone to mold and mildew growth due to their design. The rubber door gasket can trap moisture, leading to unpleasant odors and potential mold issues. - **Top Loaders:** While not entirely immune to mold and mildew, top loaders are less susceptible because they don't have a door gasket that traps moisture. Proper maintenance, such as leaving the lid open between cycles, can help mitigate this issue. 2. Cleaning the Drum: - **Front Loaders:** Cleaning the drum of a front loader can be more challenging because of its horizontal orientation. You may need to invest in drum-cleaning products or perform more frequent maintenance to prevent buildup. - **Top Loaders:** Cleaning the drum of a top loader is generally easier because you have better access to it. Regular cleaning can help prevent odors and maintain machine performance. 3. Accessibility for Repairs: - **Front Loaders:** Front loaders can be more challenging to repair because of their design. Accessing and replacing certain components may require more effort and expertise. - **Top Loaders:** Top loaders are often easier to repair due to their simpler design. Accessing parts like the motor, belt, or agitator is usually straightforward. 4. Longevity: - Both top loader and front loader washing machines can last for many years with proper maintenance. Regular cleaning, avoiding overloading, and following manufacturer guidelines can extend the life of your machine. **5. Energy and Water Efficiency:** - **Front Loaders:** Front loaders are typically more energy and water-efficient, which can lead to lower utility bills over time. This can be considered a form of maintenance cost savings. Conclusion The debate between top loader and front loader washing machines , I am sure, will continue; but maintenance is a crucial factor to consider. While each design type has its own set of maintenance challenges, the choice ultimately depends on your priorities and preferences. If you're willing to put in a little extra effort in to prevent mold and mildew buildu, a front loader's energy efficiency might be appealing. On the other hand, if you prefer simpler maintenance and easy repairs, a top loader could be the better way to go. Ultimately, neither type of washing machine is definitively a clear winner when it comes to maintenance. Your decision should be based on your specific needs, budget, and the level of maintenance you're willing to commit to. Whichever design type of washing machine you choose, regular maintenance and servicing will ensure your washing machine performs well for a good many years.
5 Reasons Why Your GE Refridgerator Leaks
By Rob Steinborn July 6, 2023
Dealing with a leaking refrigerator can be a real hassle, but don't worry! As a maintenance professional, I'm here to help you troubleshoot and fix the issue. If your GE refrigerator is leaking water, here are some things you can do to identify the problem and find the right solution: Check the Water Line One common cause of water leaks is a loose or damaged water line. The water line is a flexible tube that connects your refrigerator to the water supply. To inspect it, start by removing the kick plate at the bottom of the refrigerator. Make sure the line is securely attached to the water inlet valve. If it's loose, tighten it up. If you notice any holes or tears in the water line, you'll need to call a professional to have it replaced. Examine the Water Filter Water filter issues are another common culprit for refrigerator leaks. The filter's job is to remove contaminants from your home's water supply. If you find water leaking from the dispenser or inside the filter housing, there might be a problem with the filter. Here are a few possible filter-related issues: Clogged Filter: Over time, the filter can become clogged with contaminants, leading to leaks. To prevent this, it's recommended to change the filter every six months. If your ice cubes taste strange or the water smells bad, you might need to replace the filter more frequently. Incorrect Installation: A filter that's not installed correctly can cause leaks. Make sure to consult your user manual for the proper installation instructions for your specific refrigerator model. Damaged Filter: Inspect the filter for any signs of damage, such as cracks in the filter head or missing O-rings. If you find any damage, you'll need to replace the filter. Wrong Filter: It's important to use an OEM filter recommended by GE to ensure a proper fit and function. Generic filters might not fit correctly or work effectively, resulting in leaks. Check the Water Inlet Valve The water inlet valve controls the flow of water into your refrigerator. If it's damaged or malfunctioning, leaks can occur. To inspect the valve, start by turning off the refrigerator's power and moving it away from the wall. Then, remove the rear panel to access the valve. Look for cracks, holes, or use a multi-meter to test for continuity. If the valve is faulty, it will need to be replaced by a professional. Unclog the Defrost Drain The defrost drain is responsible for carrying away residual water from the refrigerator's defrost system to a drain pan underneath. Sometimes, water droplets can freeze inside the drain, causing blockages and resulting in leaks. If you notice water leaking inside the freezer under the bottom basket, the defrost drain might be clogged. Here's what you can do to unclog it: Create a solution by mixing 2 cups of hot tap water with 1 tablespoon of baking soda. Empty the freezer and locate the drain at the center of the rear wall. On certain models, you may need to unscrew a rear freezer panel to access it. Use a turkey baster to flush the drain with the solution. If you hear water running into the drain pan, it means the clog is cleared. Assess the Drain Pan If you've tried the previous steps and your GE refrigerator still leaks water, it's possible that the drain pan is the source. The drain pan collects residual water from the defrost system, allowing it to evaporate. However, if the pan is damaged with a hole or crack, water may leak out before it can evaporate. To check the drain pan, move the refrigerator away from the wall and remove the rear panel. If you find any damage, the drain pan should be replaced. However, if the drain pan is intact but the refrigerator isn't cooling properly, there may be a defrost system failure. In such cases, it's best to call a professional for a thorough assessment. Remember, while some refrigerator leaks can be fixed with simple DIY solutions, others may require the expertise of a professional refrigerator repair service such as A+ Appliance Repair in Louisville Kentucky. By following these troubleshooting tips, you'll be able to identify the source of the problem and take appropriate action to stop the leaks in your refrigerator.
Five Refrigerator Maintenance Tips near Louisville KY
By Rob Steinborn May 5, 2023
Tips That Will Help Save You Money In The Long Run!
More Posts
Share by: